Installing emergency lights in your vehicle is a great way to increase visibility and ensure safety in high-stress situations. For DIY enthusiasts, this step-by-step guide will help you safely and effectively install 12-volt emergency lights in your vehicle.
1. Choose the Right Lights
LED lights are the most common choice for emergency vehicles because of their brightness, energy efficiency, and long life. Make sure you choose lights that are designed for 12-volt systems, as these are compatible with most vehicle electrical setups. Also, make sure they are certified by SAE and as a Class 1.
2. Gather Your Tools
You will need:
- Wire strippers and cutters
- Crimping tool and connectors
- Fuses and fuse holders
- Electrical tape and heat shrink tubing
- Drill and mounting brackets (if required)
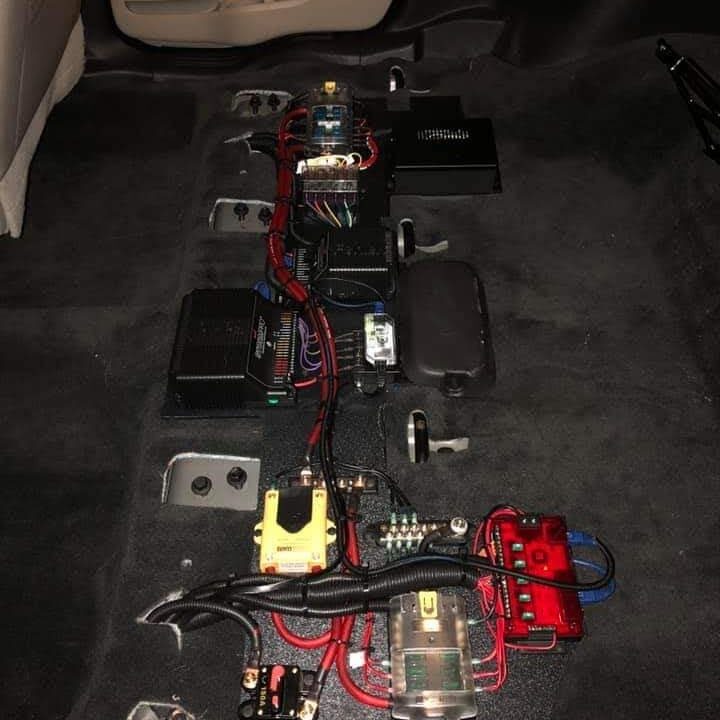
3. Plan the Wiring Route
Plan out where you will run the wires before you start. Make sure to avoid running wires near moving parts or heat sources. Using wire loom to protect the wires is recommended, especially in areas exposed to high wear. Always use the chart to plan which gauge you will use. Also make sure to select the correct type of wiring. We suggest to go with GXL type wires.
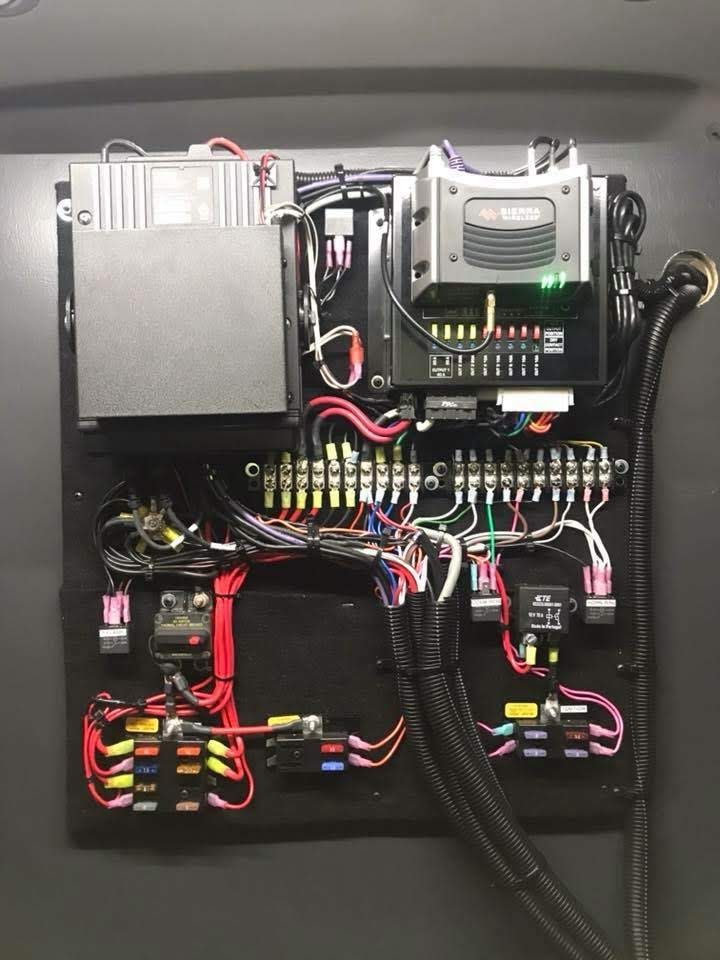
4. Connect to a Power Source
The easiest way to power your emergency lights is by tapping into an existing 12-volt power source in your vehicle. You can connect the positive wire to the vehicle’s fuse box or battery (via a fuse), and the negative wire to a grounding point on the chassis. Always make sure to protect the terminals, connections and wiring from any sharp metal parts or parts that can damage the wiring and cause shorts.
5. Install a Switch
Installing a dedicated switch will allow you to control the lights easily. Place the switch in a location that is easily accessible from the driver’s seat. Make sure the switch is rated for the current your lights will draw. If you have the budget, we strongly suggest to use a dedicated lights controller such as a Feniex Mini 4200 or either a full function controller such as Whelen Cencom, Feniex 4200, Soundoff nErgy or similar.
6. Test Your Installation
Once everything is connected, test your lights to ensure they are working properly. Check for any flickering, which could indicate a loose connection, and ensure the lights are securely mounted.
By following these steps, you can safely install 12-volt emergency lights in your vehicle, boosting visibility and safety.